Updated: 31 January 2024
Contents:
How to add clients to your Aider Advisory Platform
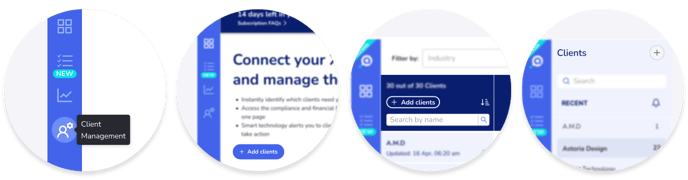
- Go to the Client Management section.
 You can also get to this section by:
- clicking on the “Add client” button on the Dashboard.
- clicking the “+” button in the Client Insights section’s navigation panel.
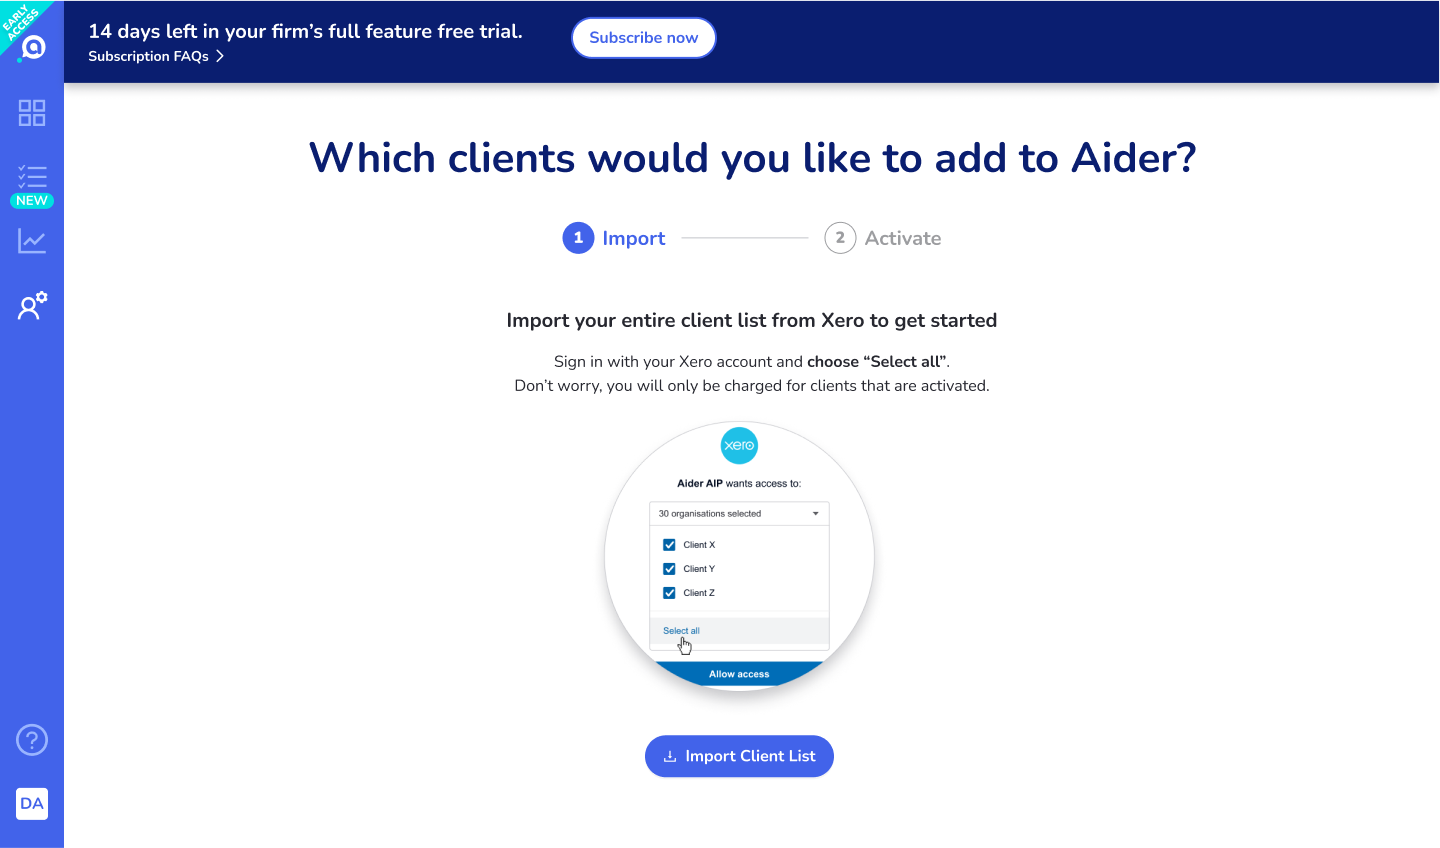
- If you have not imported your client list from Xero…
- click on the “Import Client List” button
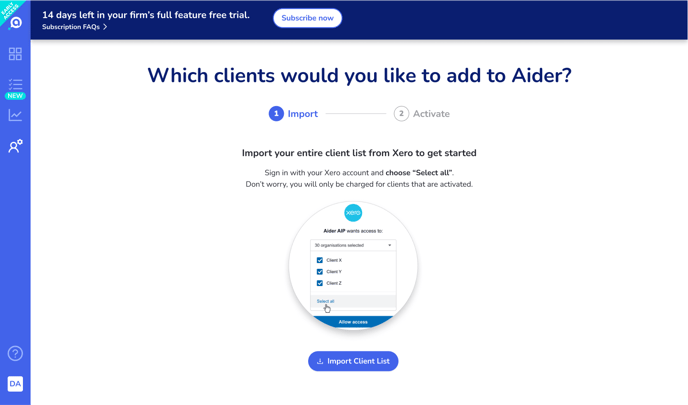
- Log into your Xero account.
- On the “Allow access” screen, choose the “Select all” option in the organisation dropdown. This allows you more control over which clients are added to Aider - e.g. only clients with Xero’s Standard or GST Cashbook subscriptions. Don’t worry, you will NOT be charged for clients imported but not activated in Aider.
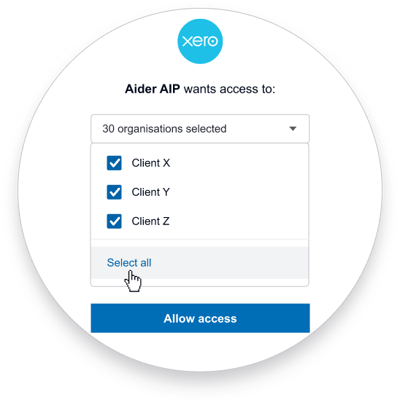
- click on the “Import Client List” button
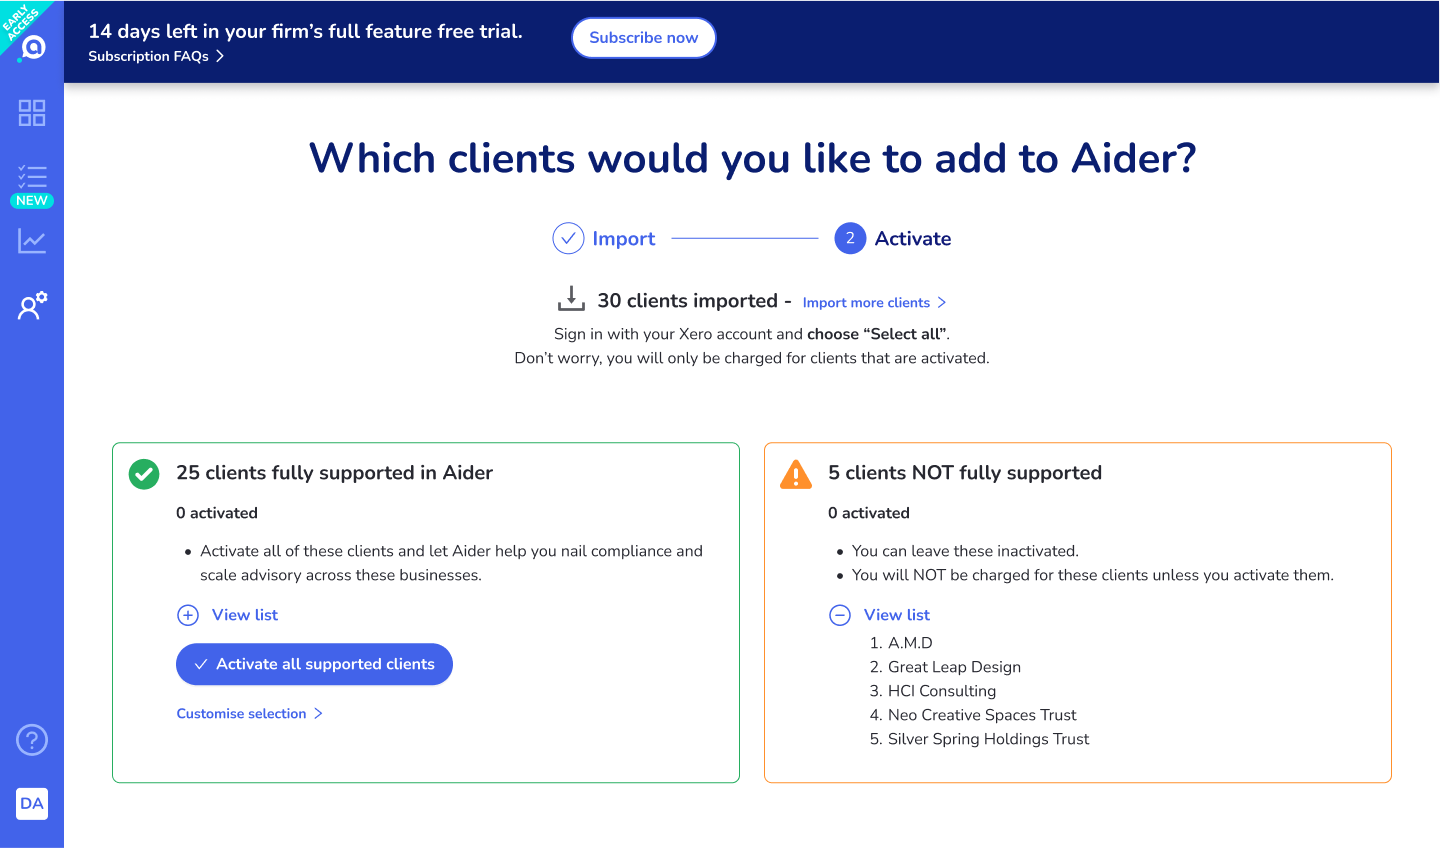
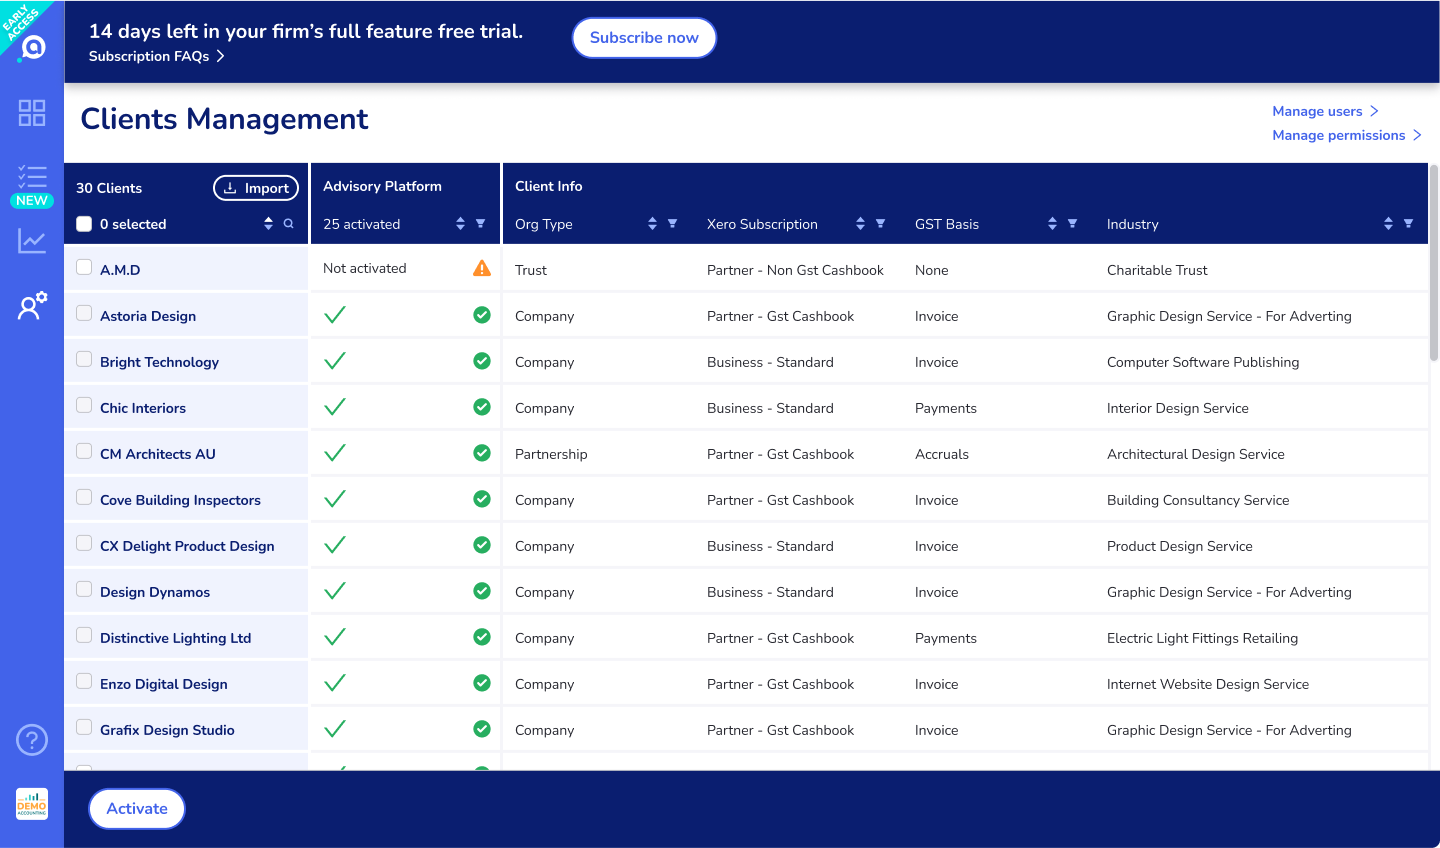
- Once your client list has been imported into Aider, choose the clients you want to activate.
- You can choose to activate all fully supported clients on the Client Management summary screen.
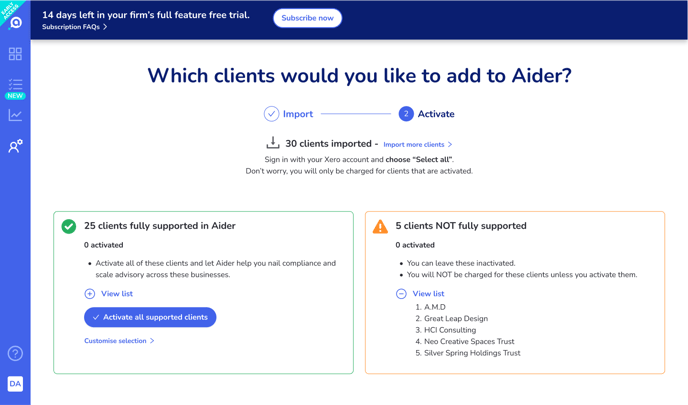
- OR you can customise your selection on the Client Management details screen. Here you can search, filter, and sort your clients by various Xero Organisation information to find the one you want to activate and monitor in Aider. Any client that’s not yet fully supported by Aider will be flagged with a
 .
.
To activate, use the checkboxes to select clients. Then click the “Activate” button.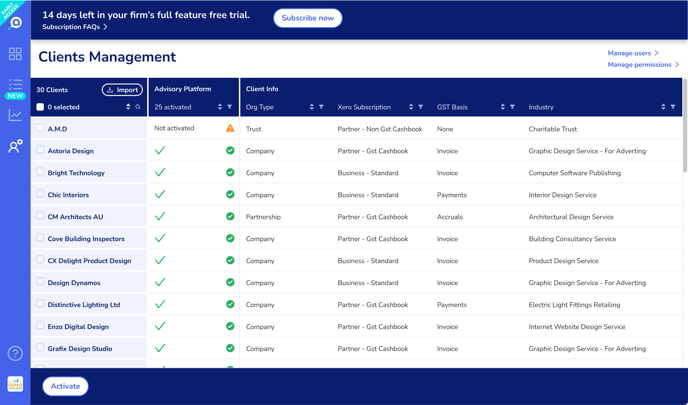
- You can choose to activate all fully supported clients on the Client Management summary screen.
- Once you activate the clients you want, Aider will start syncing their Xero data and calculate the insights. These activated clients will count towards price tier allowance. They will appear in your Dashboard and Client Insights section.
Clients that you have not activated will not be synced and won’t appear on your Dashboard and Client Insights section. You will not be charged for these clients.
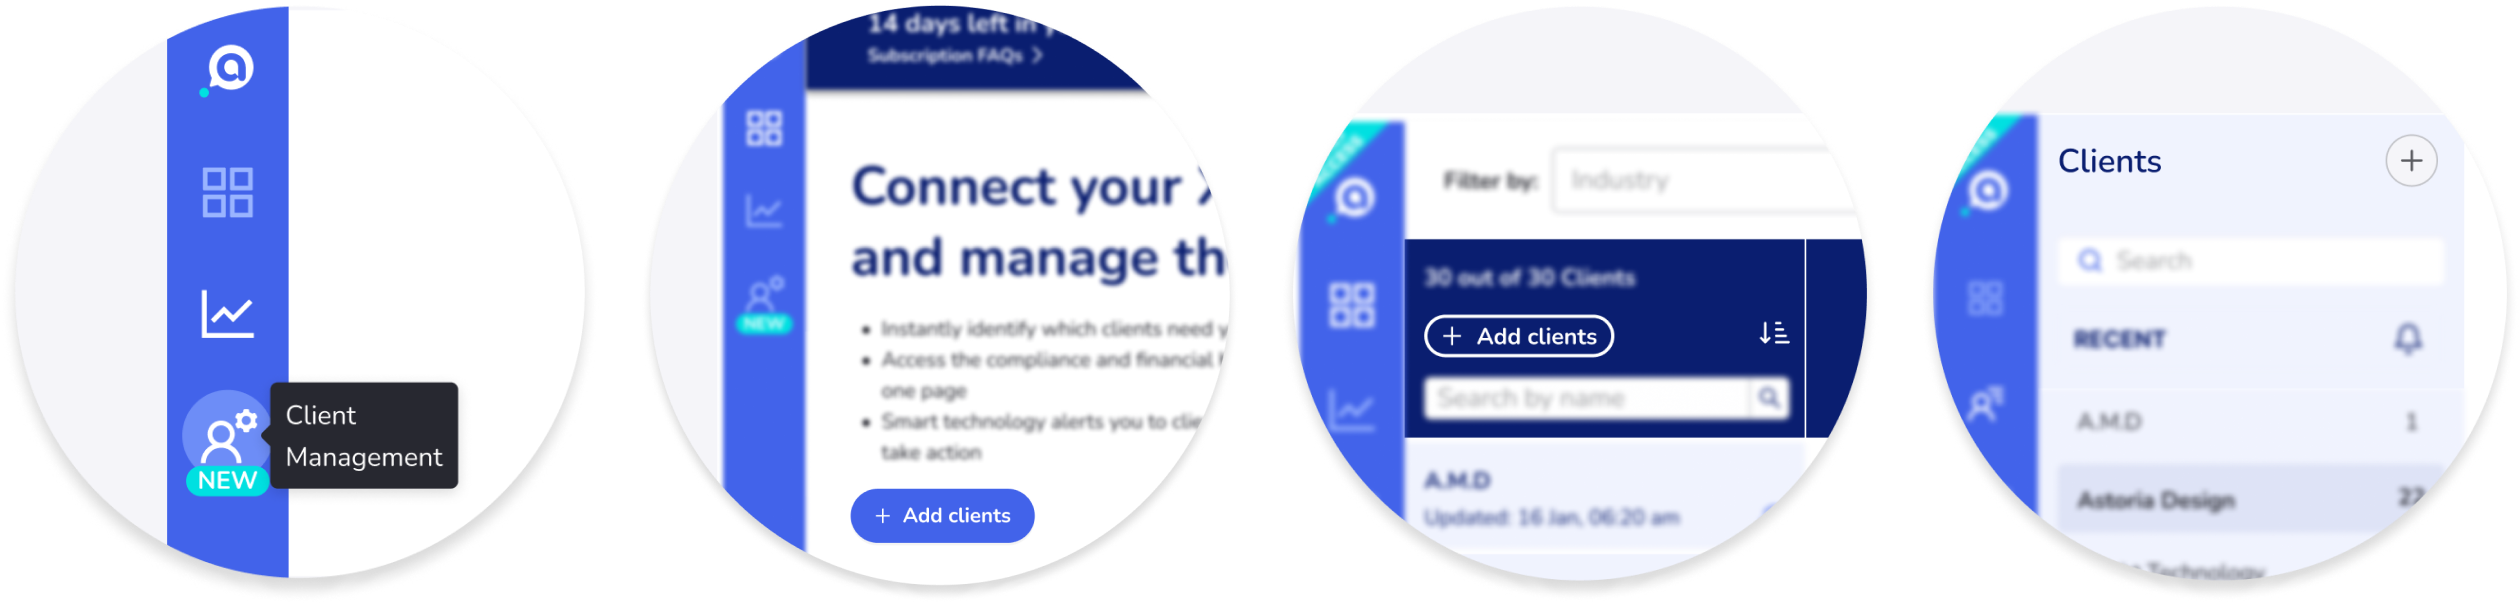
How to add or import MORE clients to your Aider Advisory Platform
- If you have imported clients that you have not yet activated, you can add these clients to your Dashboard / Client Insights by going to the “Client Management” section and activate them.
- If you have more clients that you have not imported yet, use the “Import” button in the Client Management section to import and activate them.
- NOTE:
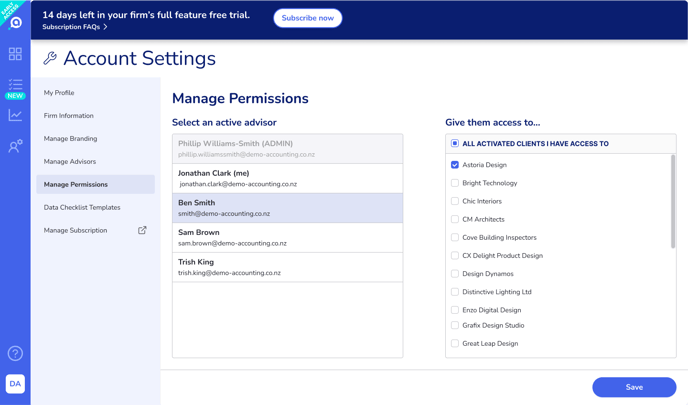
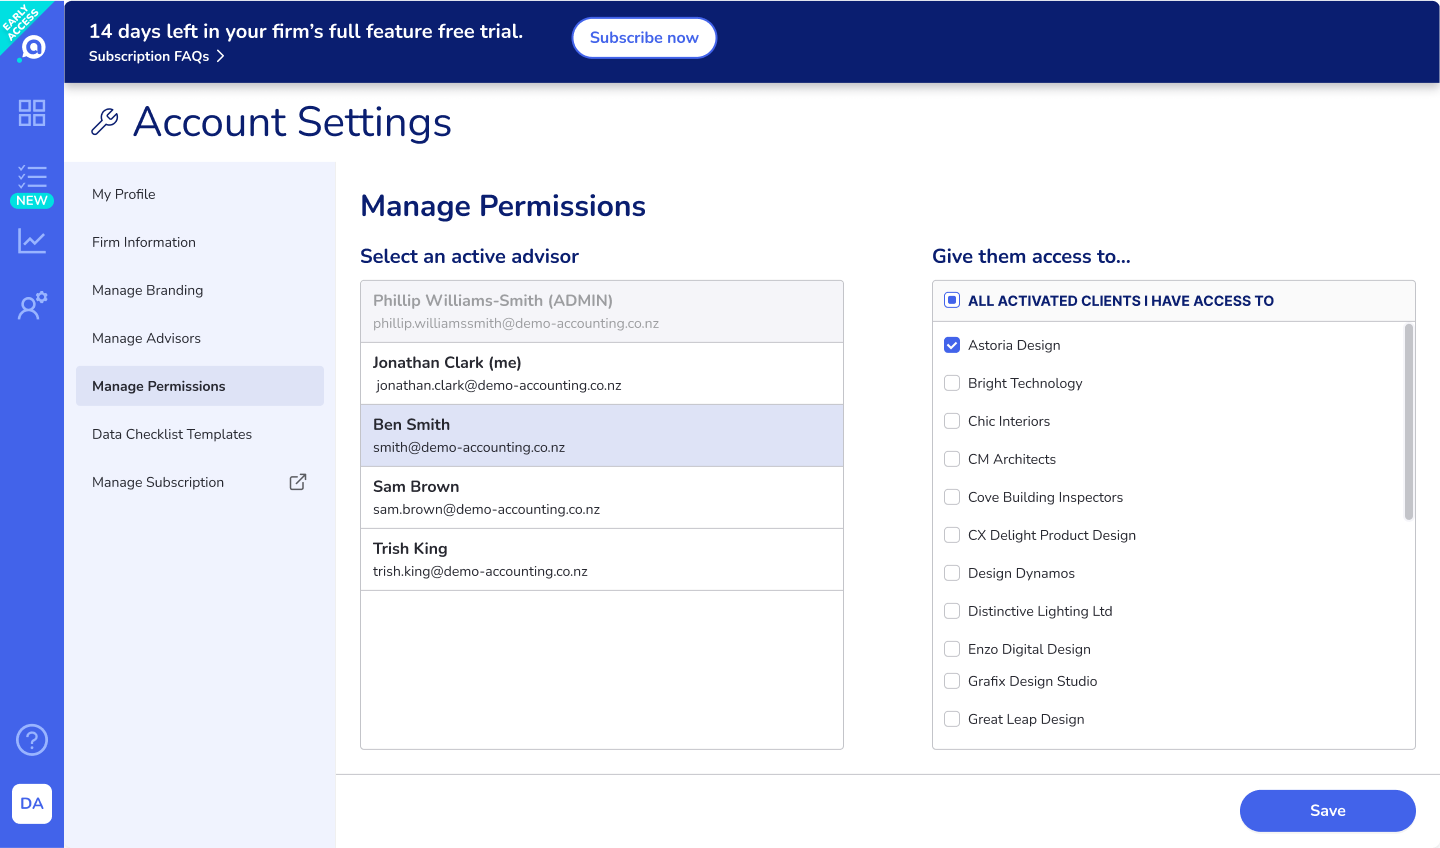
In the Client Management section, you will only see clients that you imported yourself and clients that other users have given you permission to access.
Clients added by other users will not be visible if they did not give you access permission via the Account Settings > Manage Permissions screen.
How to add clients added by other users
- If you have access to these clients’ Xero files, you can follow the instructions above to import and activate the clients again. Don’t worry, your firm will NOT be charged twice for the same client.
- If you don’t have access to their Xero files or if you prefer, ask your firm’s Admin or the user who added the clients to grant you permission via the Accounts Settings > Manage Permissions screen.
NOTE:
The Manage Permissions screen only lists fully supported clients and any unsupported clients that you chose to activate. If there are any unsupported clients that you imported but not activated, they will not appear on the list. If the client you are looking for is not listed here, check the Client Management screen to verify that they have been imported and activated.
How to view all clients added to your firm’s Aider Advisory Platform
- By default only the Admin user can see all clients added by all users in your firm.
- But the Admin and other users can grant you access to clients they added and activated. They should use the Account Settings > Manage Permissions screen to grant you access.
How to remove clients from your Aider Advisory Platform
- To remove an activated client from your firm’s Advisory Platform, go to their Client Settings screens and deactivate the client.
On the Client Management details screen, you can see the activation status of clients you imported or are granted access permission by other users.
To deactivate a client, click on their name to go to their Client Insights page.
Then click the in the top right (next to the client's name) to access their Client Settings and deactivation option.
Deactivation will stop Aider from syncing with the client’s Xero data and remove the client from the Dashboard and Client Insights section for all users in your firm. You will no longer be charged for the deactivated client.
If you change your mind, simply go to the Client Management section to re-activate the client. - If you just want to remove a client from an user’s Dashboard,
use the Account Settings > Manage Permissions screen.
Simply select the user, then deselect the activated client that you don’t want them to see, and finally save the changes.
NOTE:
You can only manage the permission of users at your level or below. You cannot change the permission of the Admin user.