Updated: 31 January 2024
Firm admin / first advisor
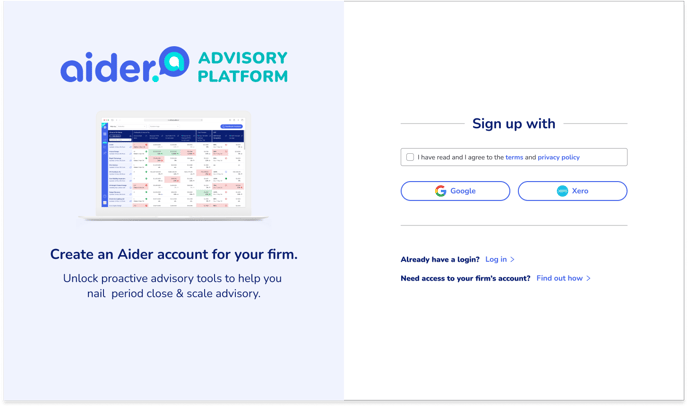 Set up an account for your firm
Go to advisory.aider.ai/signup- Create an Aider admin account for your firm by signing up with your existing Xero or Google account. If your firm has a separate company account with Xero or Google (e.g. login with admin@firmname.com), we recommend that you use this as your main Aider admin account. You’ll be able to set up a personal login in step 2. If your firm does not have a company account with Xero or Google, you can use your individual Xero or Google account (e.g. login with yourname@firmname.com).
- Once you’ve created your main Aider admin account, you’ll be asked to enter some basic information about your firm - e.g. firm name, business address (used for billing purposes only), number of clients and accountants/advisors, and accounting services you use.
- If you need help setting up your account, please contact our Customer Success Team.
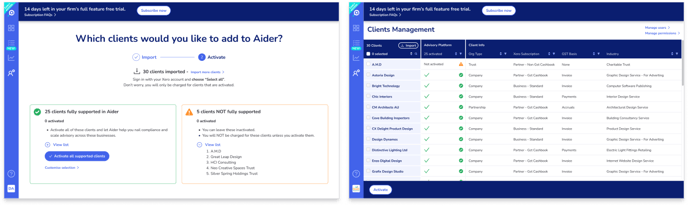 Connect your clients' Xero accounts
To add clients, import your client list from Xero, then activate the clients you want to monitor in Aider. Once activated, Aider will start loading these clients' Xero data for analysis.
Find out more >- Explore how to get the most out of Aider Dashboard and Client Insights
What is your current priority?- Ensuring client data is complete and accurate:

- Ensuring client data is complete and accurate:


OPTIONAL: Check your clients’ calculation settings
Some insights have editable calculation settings. The default settings for affected insights are shown just above the 'Trends' summary. If the default settings are inappropriate for a client, simply follow the 'Change' link provided to update the settings. You can also get to the 'Client Settings' screen via the button (top right) on the Client Insights pages.
OPTIONAL: Upload your firm logo
Simply go to 'Account Settings' (bottom icon on the left blue bar) > 'Manage Branding' to replace the account setting icon with your firm logo.
OPTIONAL: Invite your colleagues to your new Aider account
Simply go to 'Account Settings' (bottom icon on the left blue bar) > 'Manage Advisors' to send an invite. Make sure you send the invite to the email address they use for their Xero or Google login so that their login account will be linked to your firm's account.
Additional advisors
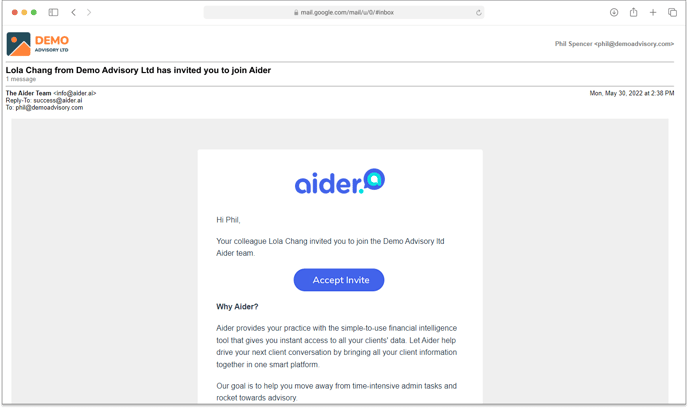 Accept your invite
You'll receive an email from your firm's account with a special invite link to help set up your advisor account with Aider. (Be sure to check your spam mailbox!) Once you locate the email, accept your invite.
If you don’t have an invite, please ask any colleagues with access to your firm’s account to send you an invite. They can find the invitation form in 'Account Settings' (bottom icon on the left blue bar) > 'Manage Advisors'. Create a login account
Create an Aider login account by signing up with your existing Xero or Google login.- Connect your clients' Xero accounts
To add clients, import your client list from Xero, then activate the clients you want to monitor in Aider. Once activated, Aider will start loading these clients' Xero data for analysis.
Find out more > - Explore how to get the most out of Aider Dashboard and Client Insights
What is your current priority?- Ensuring client data is complete and accurate:
- Ensuring client data is complete and accurate:


Some insights have editable calculation settings. The default settings for affected insights are shown just above the 'Trends' summary. If the default settings are inappropriate for a client, simply follow the 'Change' link provided to update the settings. You can also get to the 'Client Settings' screen via the